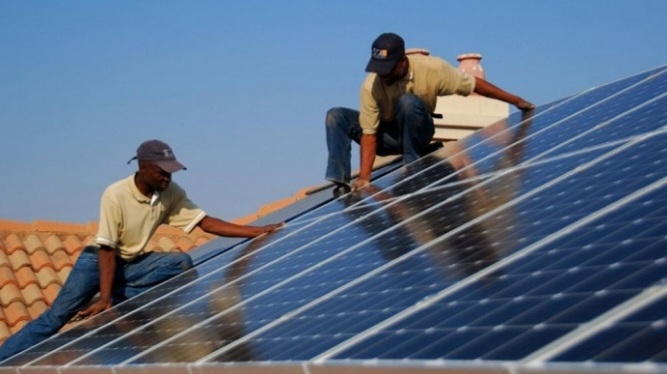
10 Game-Changing Solar Installation Tricks Every Solar Tech Should Know.
If you’ve been in the solar game for a while, you already know that no two installations are ever the same. But here’s the thing — it’s often the smallest details that make the biggest difference. Over the years, I’ve learned a few Solar Installation Tricks that separate average installations from truly professional ones.
Whether you’re mounting rooftop panels, wiring an inverter, or optimizing system performance, these field-tested tricks can save time, reduce callbacks, and make your work shine — literally and professionally.
Let’s dive into 10 practical Solar Installation Tricks that every installer should know (but most don’t).
1. Always Start with a Solar Site Survey (Not Just Measurements)
Before you lift a single panel, make sure you really understand the site. Don’t just take roof dimensions — check shading patterns throughout the day, wind exposure, and roof integrity.
Pro Tip:
Use tools like Globisun or your phone’s solar app to analyze sun paths. You’ll spot hidden shading issues that could kill performance later.
Takeaway:
A solid site survey sets the foundation for an efficient and reliable system.
2. Optimize Panel Tilt for Real Efficiency, Not Just Theory
Many installers stick to fixed tilt angles (like latitude ± 15°), but real-world efficiency depends on location, roof type, and system purpose (on-grid vs. off-grid).
Example:
In Nigeria, a tilt of 10°–15° often yields better year-round exposure than a strict latitude-based angle due to high solar intensity.
Takeaway:
Adjust tilt for actual performance, not textbook perfection.
3. Pre-Assemble Components Before Climbing the Roof
Time is money — especially under the sun. One of the simplest Solar Installation Tricks is pre-assembling mounting rails, mid-clamps, and wiring before you climb.
Example:
I usually prepare the rails, mark hole spacing, and pre-fit clamps on the ground. It cuts my roof time by nearly half.
Takeaway:
Pre-assembly improves safety, reduces mistakes, and saves valuable installation time.
4. Use UV-Resistant Cable Ties and Conduits
I’ve seen too many systems fail prematurely because standard black ties or flexible pipes weren’t UV-rated. The sun will eat those materials over time.
Pro Tip:
Always use UV-stabilized cable ties and rigid PVC conduits rated for outdoor solar use.
Takeaway:
It’s not just about tidy wiring — it’s about long-term durability.
5. Label Everything (Future You Will Thank You)
Professionalism shows in organization. Proper labeling of strings, fuses, combiner boxes, and inverters saves headaches when troubleshooting later.
Example:
I once revisited an installation a year later and located a fault in 5 minutes — simply because everything was labeled correctly.
Takeaway:
Labeling is cheap insurance against confusion and costly repairs.
6. Leave Service Loops in Your Cables
Many new installers make cables too tight. When the system expands or components shift slightly, tension causes connectors to loosen or break.
Pro Tip:
Leave gentle service loops (small extra lengths) in your wiring to accommodate thermal expansion and maintenance.
Takeaway:
A little slack today prevents a lot of stress tomorrow.
7. Keep Panels Cool — It’s Not Just About Sunshine
Hot panels generate less power. Allow airflow beneath modules by maintaining proper mounting clearance (at least 100mm from roof surface).
Example:
A rooftop system I installed ran 6°C cooler after we raised the panels slightly — boosting output by about 3%.
Takeaway:
Ventilation equals efficiency. Never hug panels too close to the roof.
8. Double-Check Polarity Before Final Connection
Sounds basic, right? Yet, it’s one of the most common mistakes even seasoned installers make when rushing.
Pro Tip:
Always use a multimeter to confirm polarity before plugging connectors into the inverter or charge controller.
Takeaway:
Ten seconds of checking saves thousands in blown components.
9. Size Your Cables with Voltage Drop in Mind
Cable sizing isn’t just about amps — it’s about voltage drop. Undersized cables lead to energy loss and poor performance.
Example:
For a 12V system with a 20A load over 15m, a 4mm² cable may work, but a 6mm² cable performs significantly better.
Takeaway:
Always calculate voltage drop — aim for less than 3% loss for optimal performance.
10. Use Smart Tools and Apps to Simplify Your Work
Gone are the days of guesswork. Today, smart tools like the Globisun app make solar sizing, battery selection, and system design easy — right on your phone.
Example:
With Globisun, you can input your appliances, energy needs, and location to get accurate panel and battery recommendations instantly.
Takeaway:
Smart installers use smarter tools — because precision and speed are part of professionalism.
Conclusion: Small Tweaks, Big Impact
There you have it — ten Solar Installation Tricks that can transform your installations from “standard” to exceptional.
Remember:
- Always prioritize accuracy and safety.
- Label and organize your work.
- Think ahead for future maintenance.
- And never stop learning new techniques or tools.
If you apply even a few of these tricks on your next job, you’ll notice smoother installations, happier clients, and fewer callbacks.
And if you haven’t already, try using the Globisun app — it’s designed to help installers like you make faster, smarter, and more accurate solar design decisions.
Because in solar installation, it’s the details that make the difference.


